之前在react项目中引入过一次sentry项目,这次需要在Vue-cli项目中引入。基本原理是一样的,还是用webpack-plugin来上传source-map。
sentry后台管理页面可以使用官方版(需要付费),也可以自己搭建。这次直接在官网上配置。
1.新建组织、新建项目。
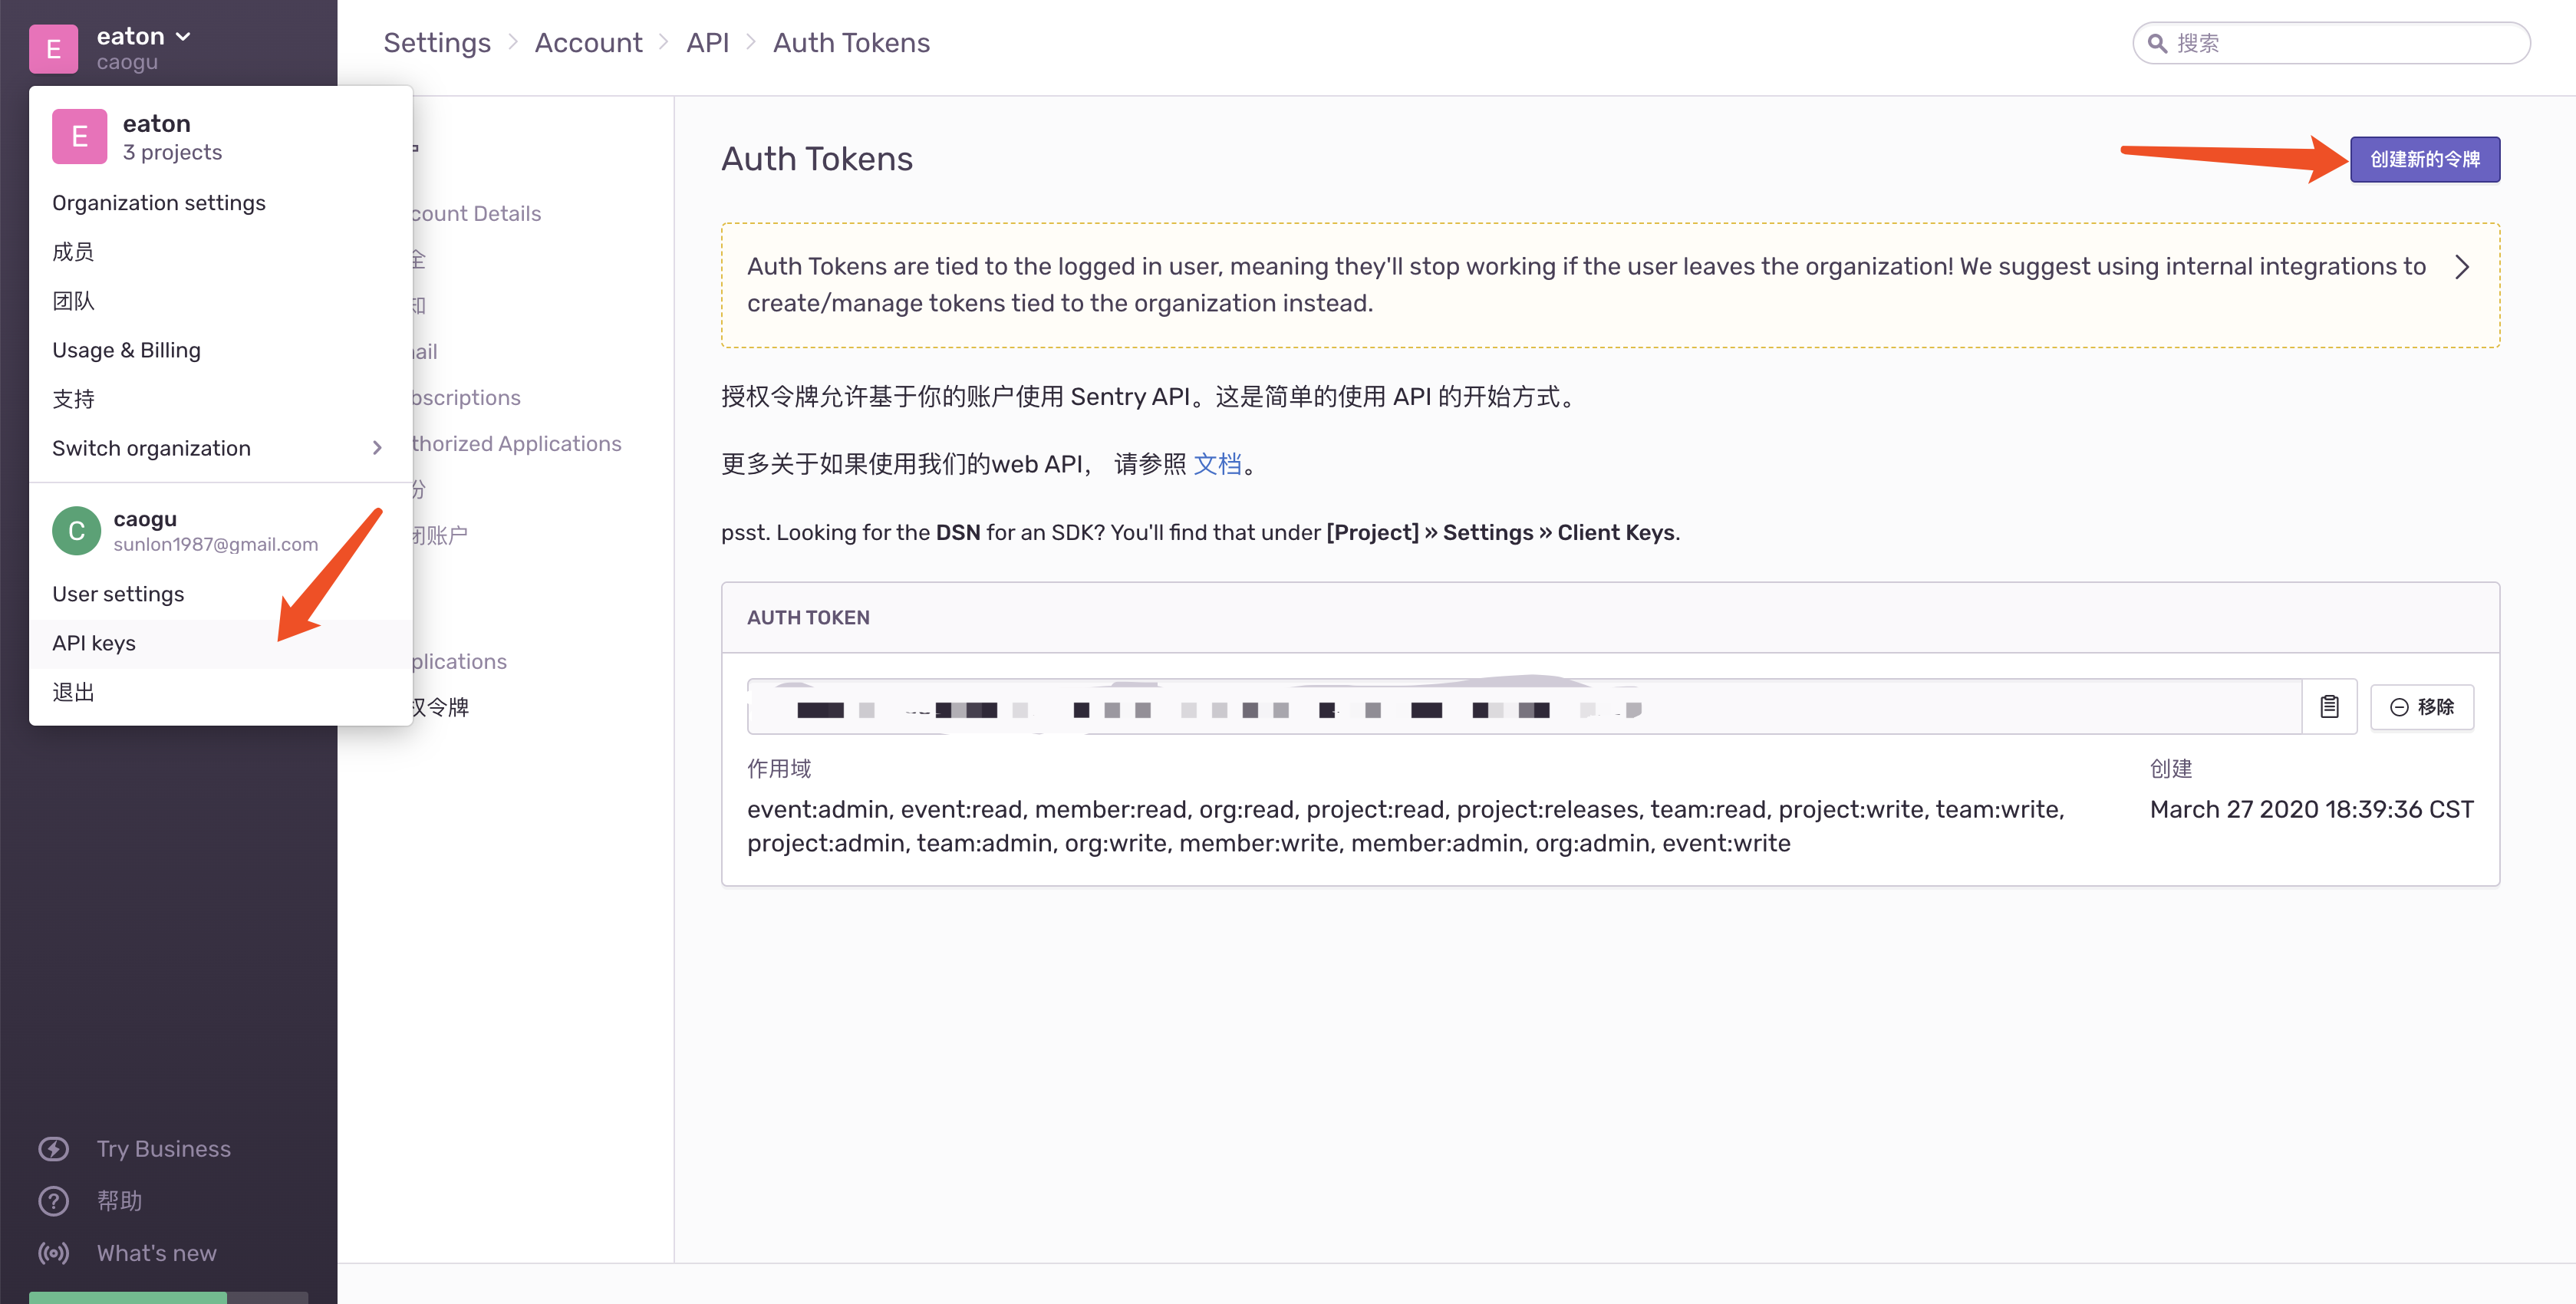
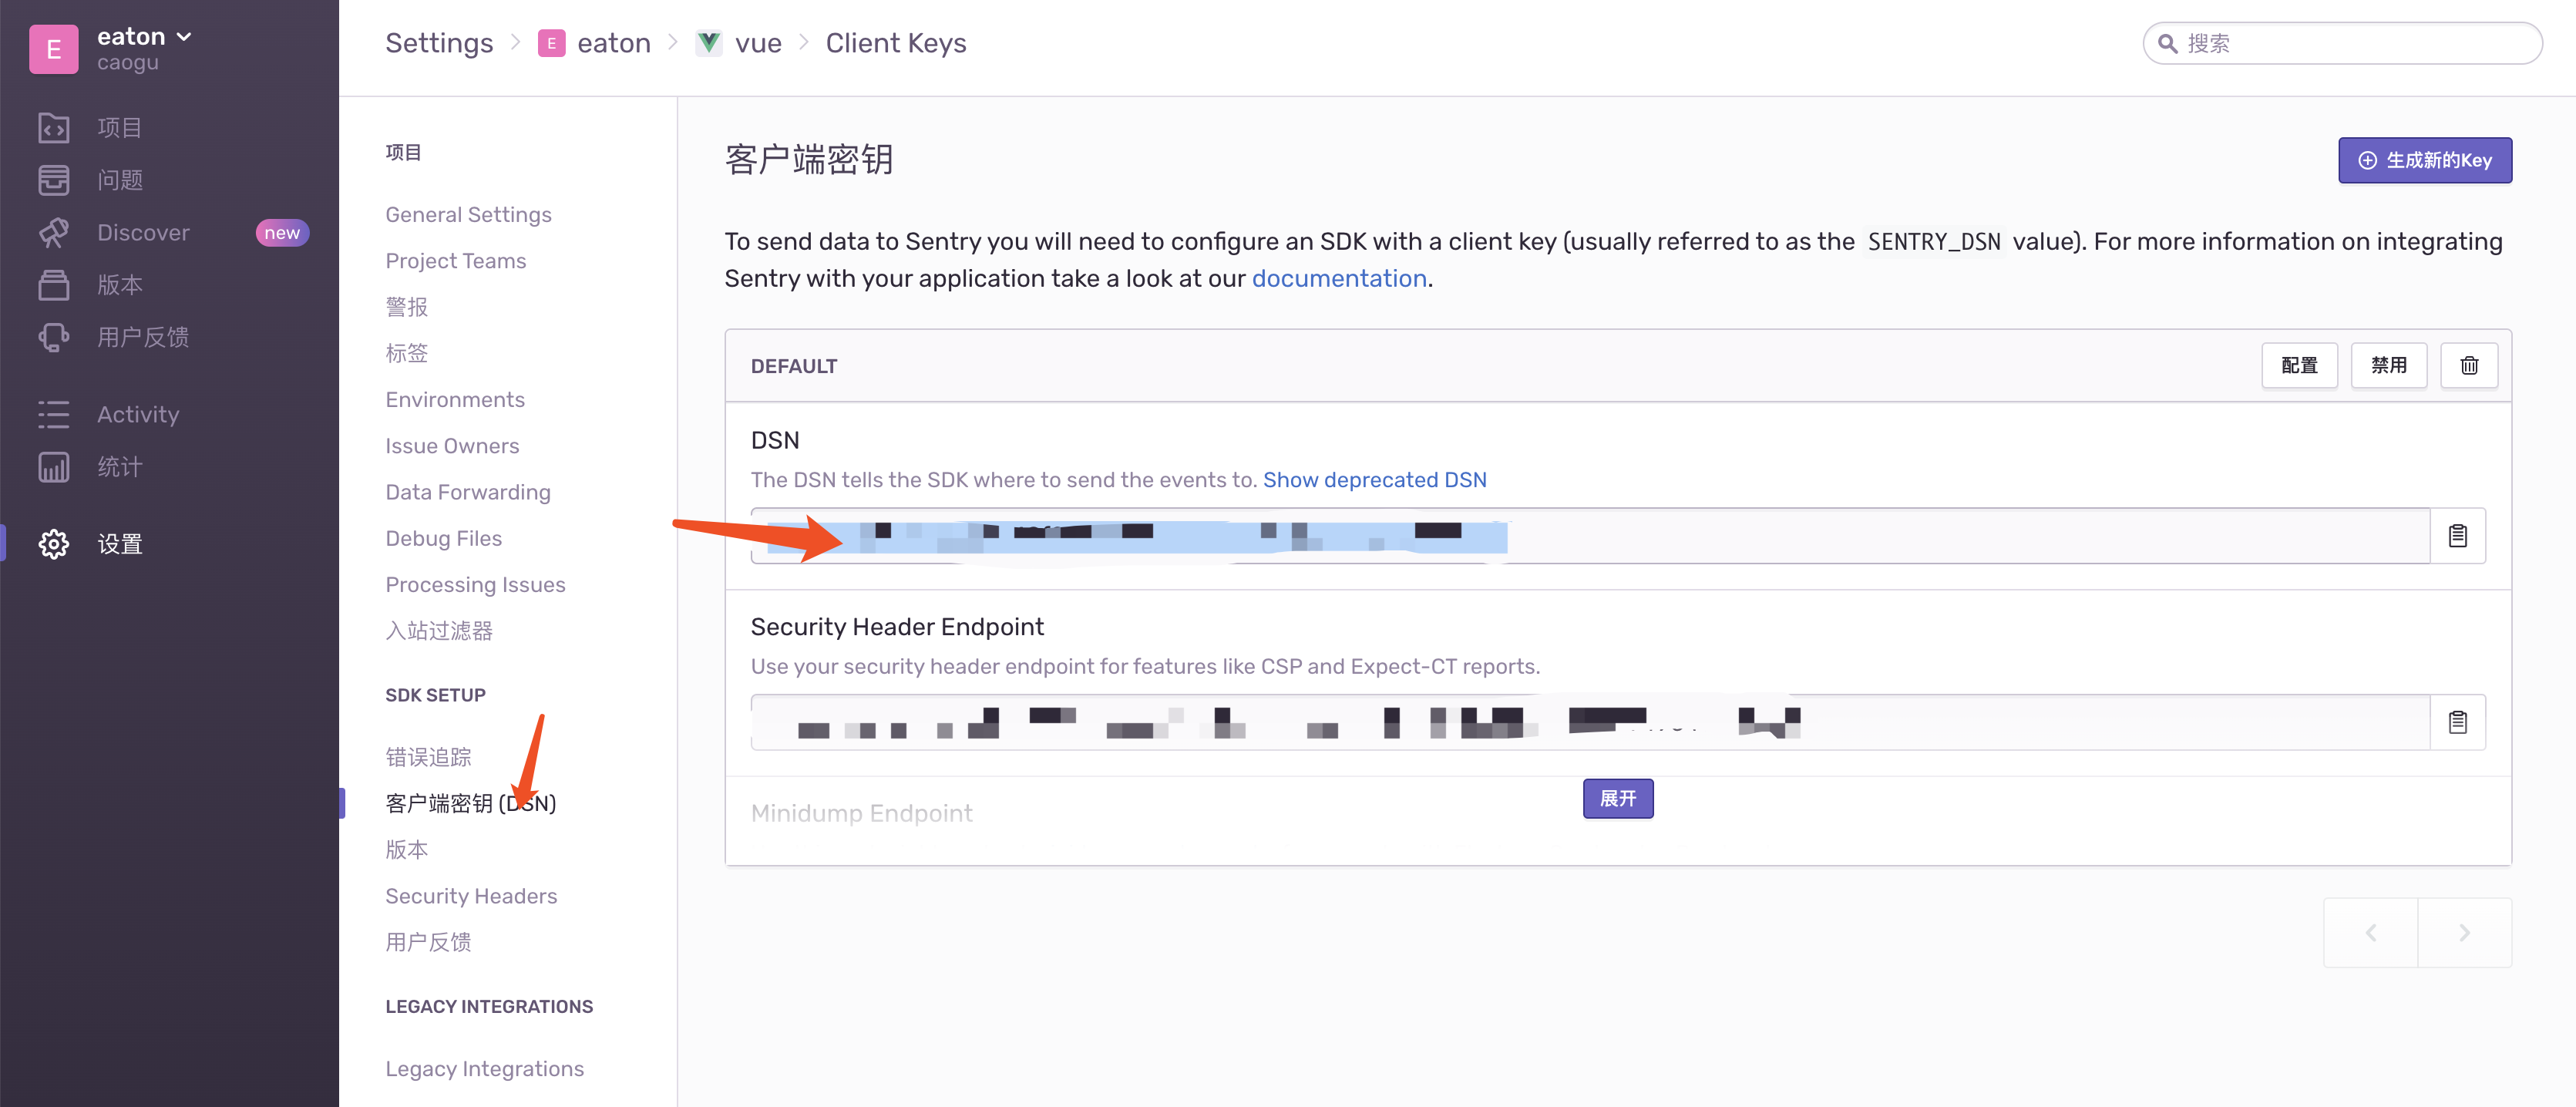
2.生成客户端密钥。
3.vue-cli项目中:
npm install @sentry/browser @sentry/integrations -S
|
4.main.js中添加代码:
import * as Sentry from '@sentry/browser';
import * as Integrations from '@sentry/integrations';
process.env.NODE_ENV === 'production' && Sentry.init({
dsn: '你的客户端密钥DNS',
integrations: [
new Integrations.Vue({Vue, attachProps: true}),
],
});
|
5.使用@sentry/webpack-plugin打包时自动上传source-map文件
npm install @sentry/webpack-plugin -D
|
6.在根目录创建文件.sentryclirc 内容:
[defaults]
url=https://sentry.io
org=eaton
project=vue

[auth]
token=abe8eada0dc5431681ad6cf49f16f17e975202216aa84e93bcbb7a6047afaa2e //上图中 API Keys 中对应的AUTH TOKEN
|
7.在vue.config.js中添加:
const SentryPlugin = require('@sentry/webpack-plugin')
module.exports = {
...
productionSourceMap: true,
chainWebpack: config => {
if (process.env.ENV === 'production') {
config.plugin('sentry').use(SentryPlugin, [{
ignoreFile: ['node_modules', '.gitignore'],
include: './dist',
configFile: './.sentryclirc',
release: process.env.RELEASE_VERSION,
urlPrefix: '~/owner/'
}])
}
},
}
|
8.修改npm run build命令在打包上传完成后删除source-map文件:
//package.json
"scripts": {
	"build": "vue-cli-service build && rm -rf dist/static/js/*.map"
}
|
最后可以在管理页面中看到上报的事件:

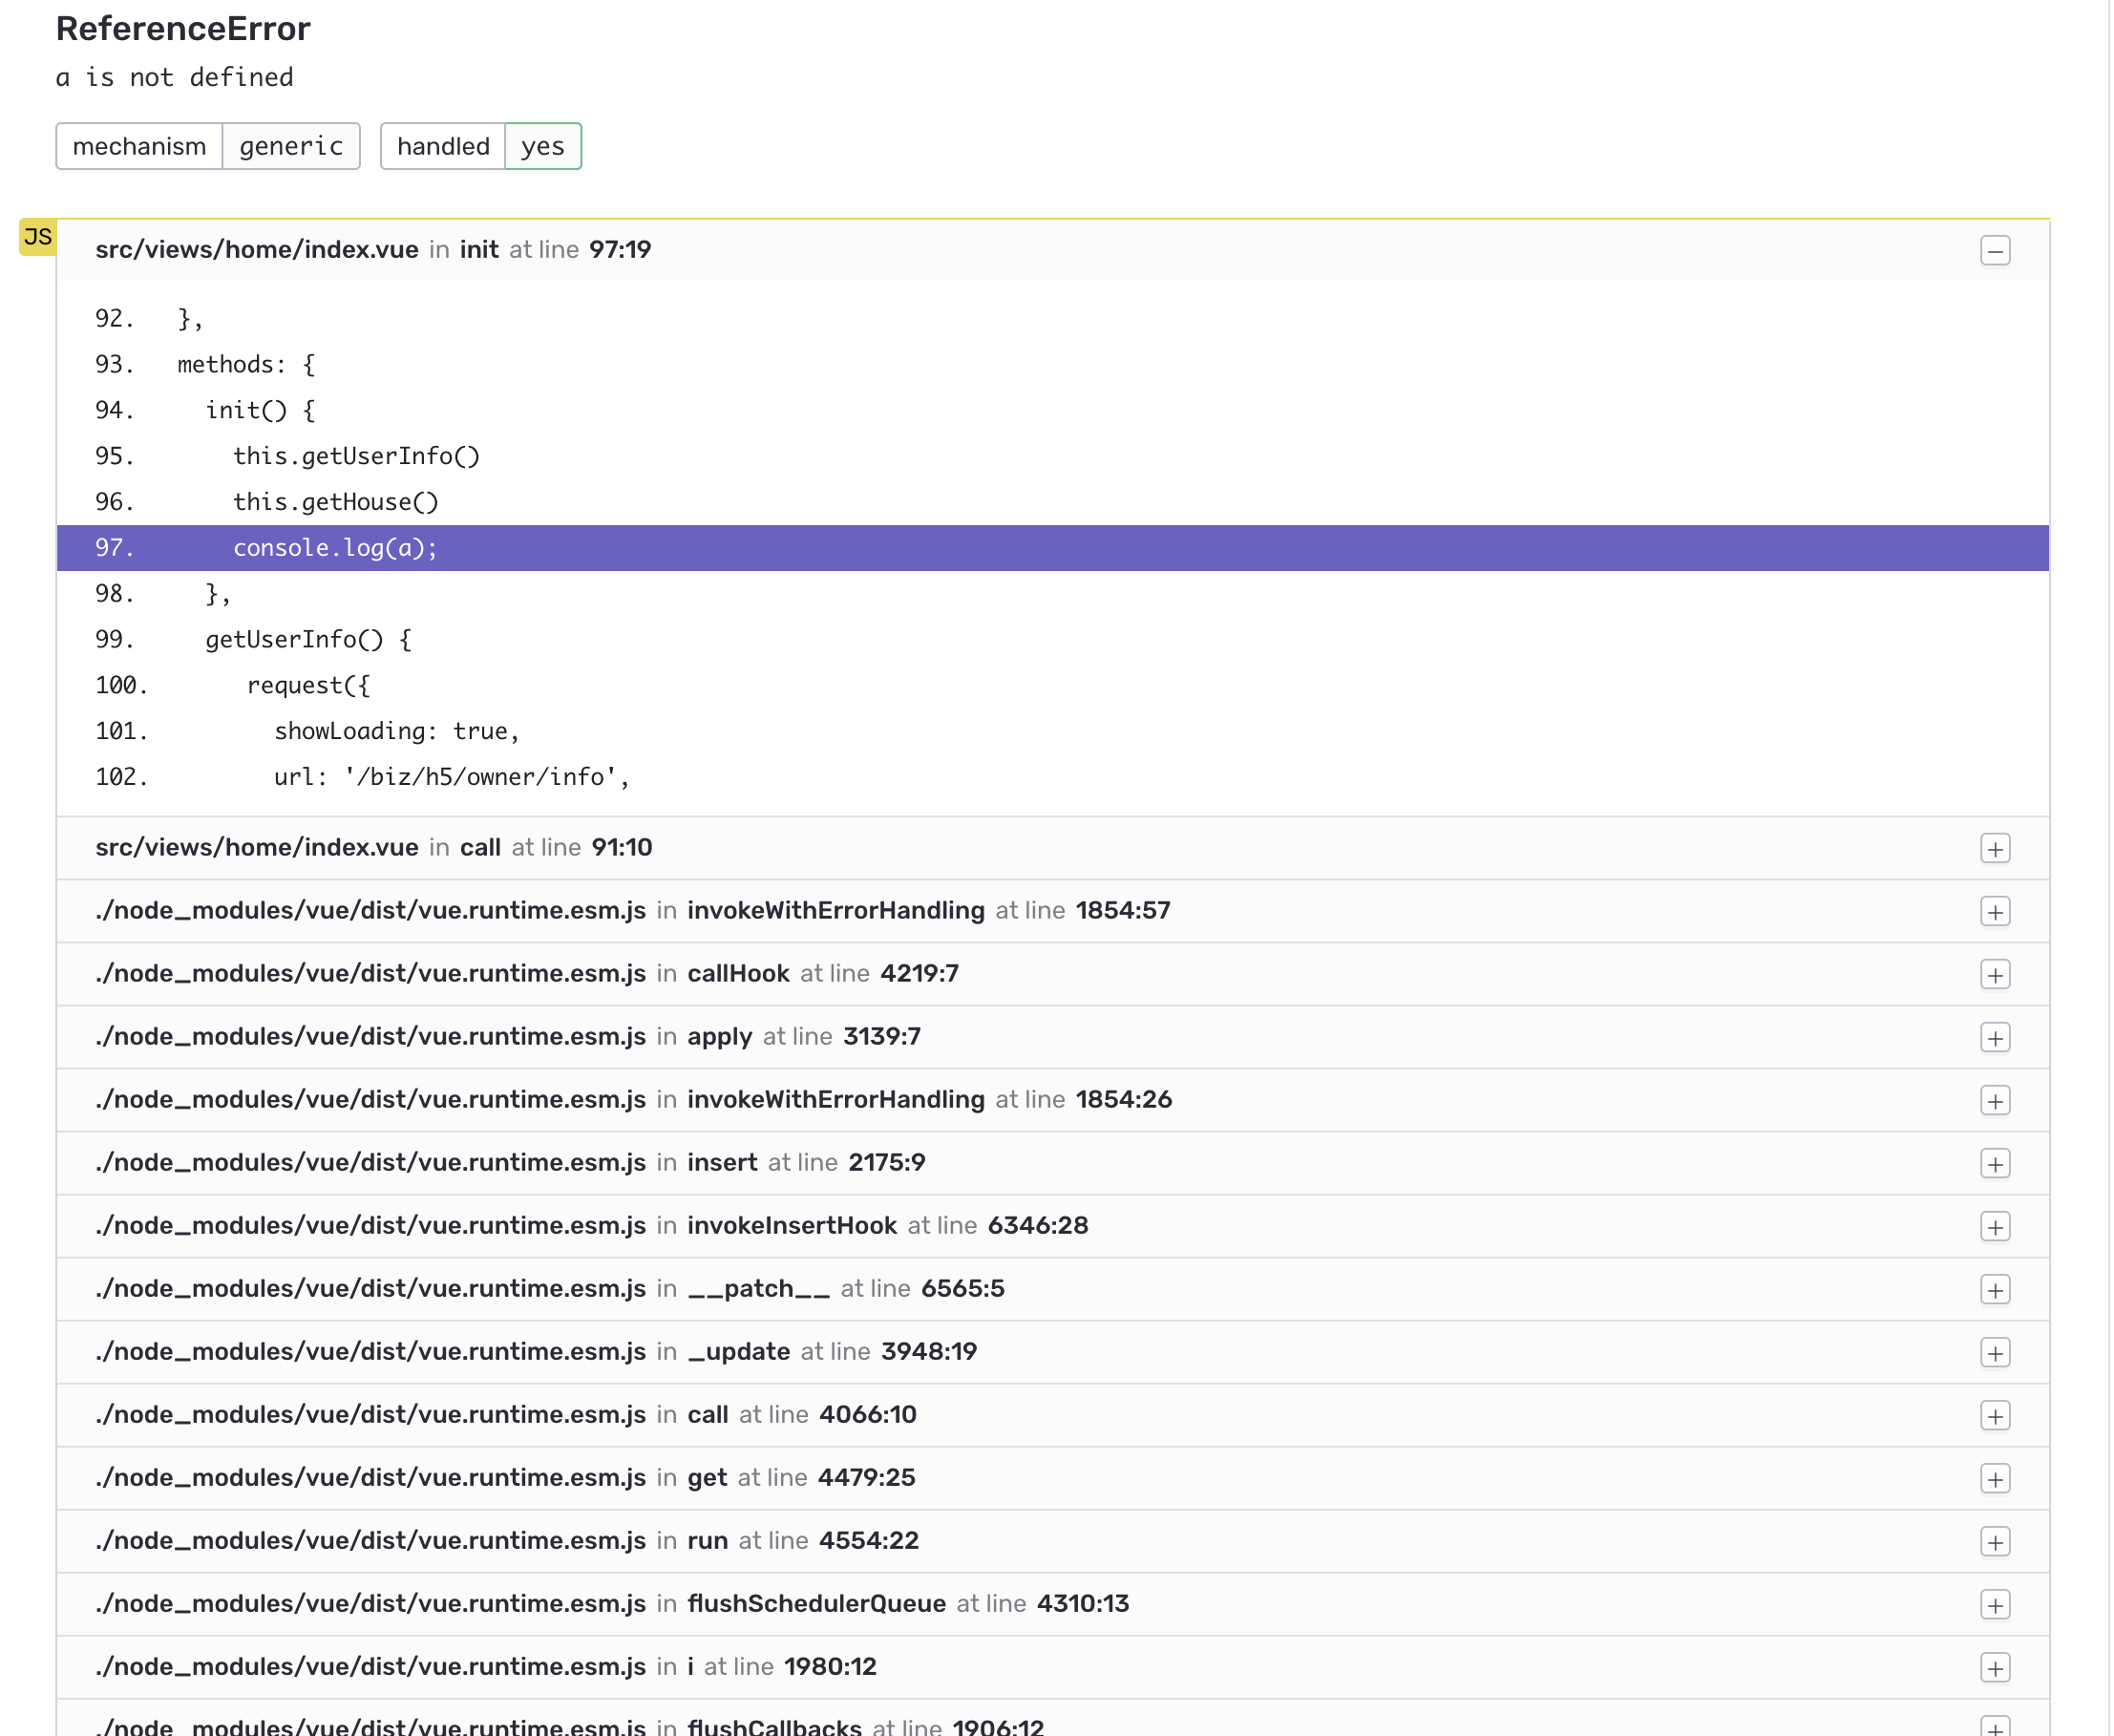
上传了source-map后可以准确的定位到错误产生的那一行,这里是为了测试使用了未定义的变量a。